
Post-Press Finishing for Custom Printing: The Final Step to Give Printed Materials a "Premium" Feel


I. What Is "Post-Press Finishing"?
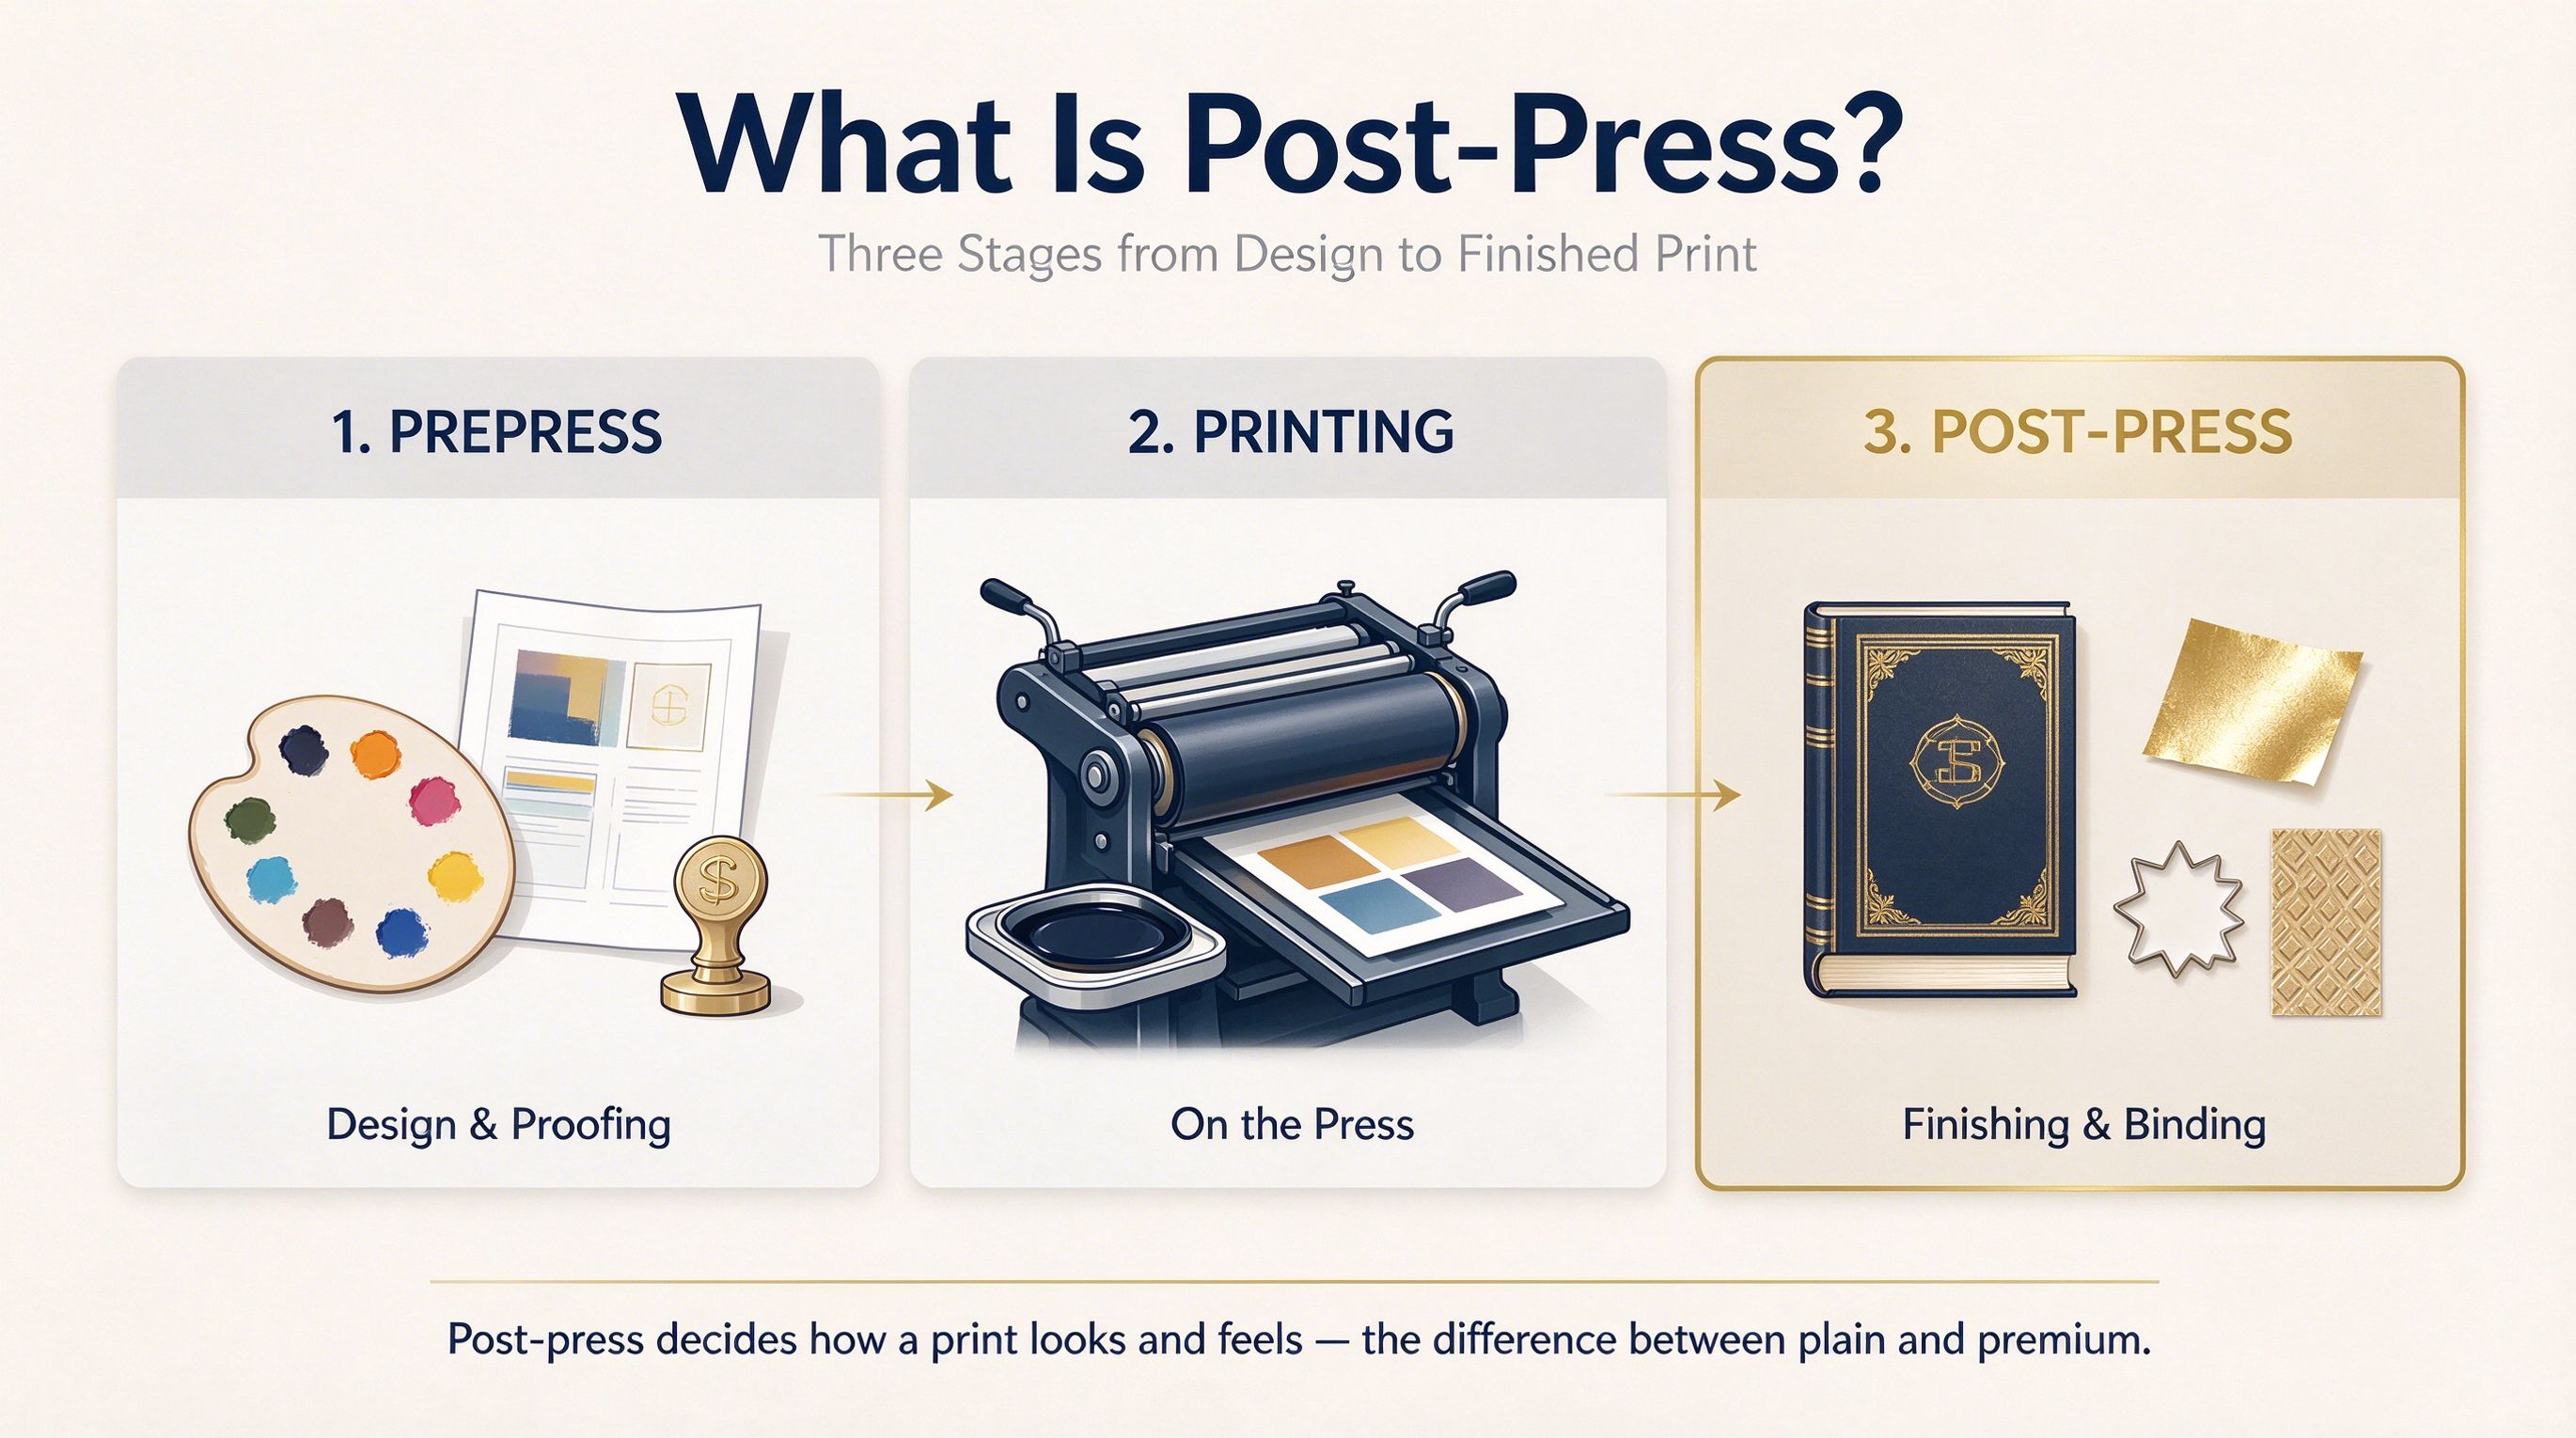
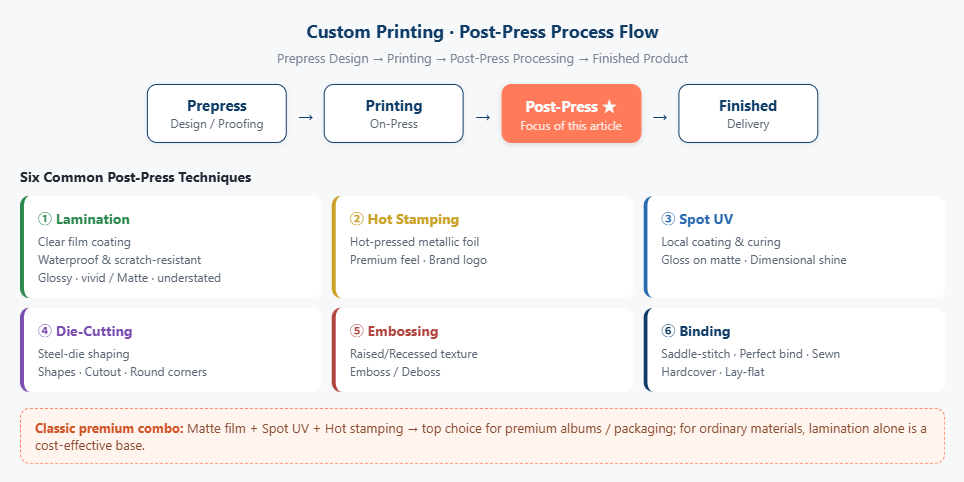
The journey of a printed product from design draft to finished item typically involves three major stages: pre-press (plate making and proofing) → press (actual printing) → post-press (finishing and forming). The term "post-press processes" refers to the various treatments applied after printing to enhance the product's aesthetic appeal, durability, and tactile quality.
If the printing process determines "what is printed" on the paper, then post-press finishing determines "how it feels to the touch and how premium it looks." The same design draft, when printed off-paper, and when processed with hot stamping, lamination, and die-cutting, are completely different products – this is the core value that distinguishes custom printing from ordinary mass printing.
II. What are the common post-processing techniques?
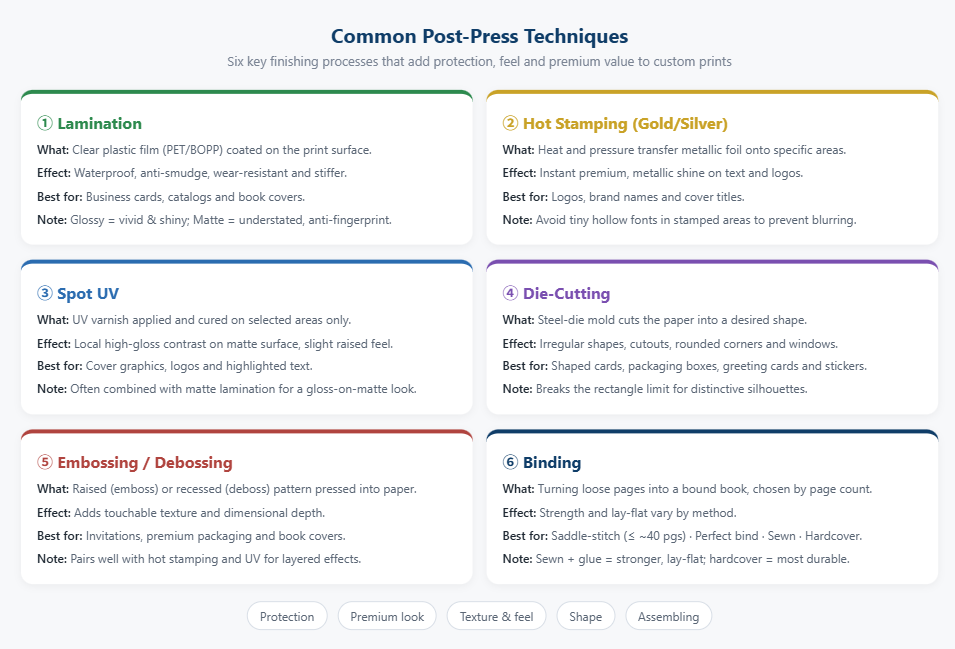
1. Lamination — The Essential "Protective Shield"
A layer of transparent plastic film (PET or BOPP) is applied to the surface of the printed material. Options include gloss lamination (reflective and vibrant) and matte lamination (subdued and fingerprint-resistant).
◊ Function: Waterproof, stain-proof, wear-resistant, and increases stiffness; it is the most common process for business cards, brochures, and book covers.
◊ Suitable for: Printed materials intended for long-term preservation and frequent handling.
2. Hot Stamping (Gold/Silver) — A Key Tool for Elevating the "Premium Feel"
Using heat and pressure, metallic foil is transferred onto specific areas of the paper surface to create text or patterns with a metallic sheen—such as gold or silver.
◊ Effect: Instantly elevates texture and perceived quality; commonly used for logos, brand names, and cover titles.
◊ Note: Avoid applying foil stamping to fine, hollow-style fonts, as this can easily lead to blurring or smudging during the process.
3. Spot UV – Contrast between Gloss and Matte
On printed materials coated with matte film or plain paper, UV varnish is applied to specific areas and cured to create localized highlights.
◊ Function: It makes certain areas of the matte surface shiny, creating a "three-dimensional reflective" contrast effect, and it feels slightly raised to the touch.
◊ Suitable for: Cover graphics, logos, and key text.
4. Die-cutting – Giving printed materials a "shape"
Using steel rule dies to cut paper into specific shapes allows for the creation of custom-shaped cards, cut-outs, rounded corners, window cut-outs, and more.
◊ Function: To break through the limitations of rectangles and create unique shapes.
◊ Suitable for: Custom-shaped business cards, packaging boxes, greeting cards, and stickers.
5. Embossing/Debossing — Tactile Texture
Patterns are pressed into the paper surface using male and female dies; this process is categorized into embossing (creating a raised effect) and debossing (creating a recessed effect).
◊ Function: Enhances tactile feel and three-dimensionality; when combined with hot stamping and UV coating, it can create a high-end craftsmanship combination.
◊ Suitable for: invitations, high-end packaging, book covers.
6. Binding – Turning loose pages into "a book"
Select by page count and usage scenario:
◊ Saddle Stitching: For publications with few pages (approx. 20–40 pages); low cost; resembles a magazine.
◊ Perfect Binding (Adhesive Binding): For medium page counts; features a flat spine; the most common style for paperbacks.
◊ Sewn binding: Sewn binding is done first, then glued, resulting in a stronger bond and the book can be laid flat, making it suitable for thick books. suitable for thick books.
◊ Hardcover (Case Binding): Cover features a rigid board backing; impressive and durable; suitable for art books, commemorative albums, and collector's editions.
In addition, there are dozens of specialized finishing techniques, such as folding (accordion fold, cross fold), hole punching, corner rounding, edge wrapping, magnetic closure boxes, and hot-stamped edges.
III. How to choose post-printing processes for custom printing?
Here are a few practical suggestions:
| Requirement | Recommended Process | Result |
| For everyday use | wear-resistant coating (glossy/matte) | waterproof and stain-resistant, stiff |
| Brand Emphasis | Premium feel: foil stamping + embossing | Metallic luster, dimensional effect |
| Highlighting a specific element | Spot UV | Spot gloss on a matte finish |
| Custom/Creative Shapes | Die-cutting + Rounded Corners | Unique Shapes |
| Books in bound volumes | Sewn binding / Hardcover | Sturdy, lays flat |
| Cost-effective, low-volume | Saddle stitching, lamination | Fast, affordable |
Core Principle: Craftsmanship serves the content and budget. For brochures and premium packaging, prioritize the classic combination of matte lamination, spot UV, and foil stamping; for event flyers and promotional materials, standard lamination is sufficient to keep costs down. At the same time, the more complex the process, the higher the price and the longer the cycle. Before customization, you must confirm the sample with the printing factory to avoid the finished product not matching your expectations.
IV. One-sentence summary
Post-printing processes are like "makeup and shaping" for printed materials; the same design can have vastly different values depending on the process. Understanding these processes will enable you to communicate more professionally with the print shop when placing your next order.