Complete Guide to Customizing Your Own Cards
Oct 14, 2026
f you want to create your own set of cards—whether for an original board game, a commemorative collection, character profiles, merchandise photocards, or business gift cards—this guide explains the entire process step-by-step. From initial concept and specification selection to design, production, prototyping, and final mass production, it breaks everything down in a way that is easy for beginners to understand.
I. Clarify Requirements: Determine the Purpose of the Cards First
Before seeking out a printing company, nail down the core details to avoid repeated revisions and increased costs.
1.Card Uses
• Board Game Cards: Durable and tear-resistant, frequently shuffled; thick cardstock with lamination is preferred.
• Collectible/Commemorative Cards: High-quality feel is important; options include hot stamping, UV coating, and partial embossing.
• Gift/Promotional Cards: A balance of aesthetics and cost-effectiveness; flexible sizes are available.
• Character/Character Cards: Portable design is key; similar in size to celebrity photocards.
2.Card Quantity
This refers to both the number of cards per set and the total print run. The printing industry has minimum order requirements; producing small quantities (1–50 sets) results in a high unit price, whereas large-scale production significantly lowers the cost per unit.
3.Usage Scenarios
Frequent hand-shuffling → Lamination is essential; long-term storage/collecting → Consider scratch-resistant finishes; outdoor use → Thicker stock + waterproof lamination.
II. Selecting Card Size and Basic Specifications
Common sizes (custom sizes available)
• Standard playing card size: 63×88mm (most universal, easy to match with card sleeves)
• Tabletop game TCG size: 62×89mm (same as Magic: The Gathering and Pokémon cards)
• Small card size: 54×85mm (Korean idol small cards, suitable for portrait collectible cards)
• Large cards / Story cards: 70×100mm, 80×120mm (suitable for illustration and story cards)
Note: Customizing non-standard shapes requires additional mold creation, resulting in higher costs; non-standard shapes are not recommended for small-batch orders.
Paper Selection
• 300g coated paper: the best value for money, with good color reproduction, suitable for ordinary cards. Lamination is recommended, otherwise it is easy to scratch.
• 350g Blue-core / Black-core Paper: Commonly used for professional playing cards and board games; opaque, firm to the touch, and smooth to shuffle. The top choice for premium cards.
• Specialty paper: Touch paper, pearlescent paper, has a high-end texture, but weak color expression. It is suitable for simple commemorative cards, but not suitable for a lot of color illustrations.
Lamination options (very important)
• Matte finish: Non-reflective with a sophisticated, appealing look; resistant to fingerprints. Recommended for collectible cards and character art cards. Drawback: Slightly less scratch-resistant than glossy finish.
• Glossy film: Bright and vibrant, waterproof and scratch-resistant, suitable for board game cards that are frequently shuffled; highly reflective, making it slightly difficult to see the image under strong light.
III. Design File Specifications (The aspect printing plants prioritize most)
File errors directly lead to issues such as color discrepancies and cutting misalignment in the finished product; this is a major pitfall area in custom printing.
• File Format: PDF is preferred, followed by TIFF; do not submit raw JPG files (compression often causes blurriness).
• Resolution: ≥300 DPI to ensure print clarity; web images (72 DPI) will appear blurry when enlarged for printing.
• Bleed: Include a 3mm bleed on all sides. Example: For a finished size of 63×88mm, the canvas size should be set to 69×94mm. Important content (text, faces, key patterns) should be at least 2mm away from the cut line to prevent content from being cut off.
• Color Mode: CMYK; do not use RGB. RGB colors on screen appear more vibrant than the printed product; The RGB colors on the screen will be more vibrant than those in the printed product; directly exporting RGB colors for printing will result in significant color differences.
• Text: The text should not be too small; a font size of ≥6pt is recommended. Small text in light colors is easy to blur, so try to avoid it.
• Back Design: The card backs can feature a uniform design across the set or unique designs for each card; using a uniform back design is more cost-effective.
IV. Optional Advanced Processes (to enhance texture; add as desired)
The more processes involved, the higher the price; choose according to your needs
• Hot stamping with gold / silver / colored gold: Text or lines are stamped with metallic colors, creating a strong sense of atmosphere on collectible cards; only suitable for simple designs, large areas of hot stamping are very expensive.
• Raised UV (Spot UV): Adds a tactile, raised texture to specific design elements, effectively highlighting illustrations or logos.
• Embossing/Debossing: Creates raised or recessed textures on the paper without using ink; offers a subtle, sophisticated look.
• Rounded Corners: Rounds the card's corners to prevent sharp edges; highly recommended for almost all cards due to the low cost.
• Die-cut irregular shapes: Cards are made into shapes such as circles and human figures, which require individual mold making and are suitable for small batches of art cards.
• Laser/Holographic Effect: Features laser-silver or rainbow-holographic finishes that shimmer as the light changes; a popular choice for collectible cards.
V. Proofreading & Sampling: Do not proceed directly to mass production!
• Online Proof Review: The printing facility will first provide a digital proof. Carefully check the text, typos, card numbers, image orientation, and dimensions. Text errors cannot be corrected after printing.
• Physical Proofing: We strongly recommend producing a physical proof before proceeding with full-scale mass production. You can see the color, paper thickness, lamination feel, and processing effect with your own eyes.
Sampling is charged separately. Mass production will be arranged only after the sample is confirmed to be correct.
Note: Slight color differences may occur between digital proofing and mass printing. Please confirm the color difference standard with the factory in advance.
VI. Packaging Plan
Select packaging based on requirements:
• Simple: Clear OPP bags, individually packaged sets;
• Paper Box: Full-color white cardstock boxes or lid-and-base boxes, suitable for complete board game card sets;
• Tin Box: Premium collector's sets offering superior protection, at a higher cost;
• Insert: EVA foam inserts to hold cards securely in place, used for gift box sets.
VII. Overview of the Customization Process
1. Define card specifications: dimensions, paper weight, quantity, lamination, special finishes, and packaging.
2. Design the front and back of the cards → Export a PDF file compliant with print specifications.
3. Send to the print shop for a quote; confirm the delivery schedule and cost breakdown.
4. Approve the digital proof → Produce a physical prototype.
5. Inspect the prototype and give final approval.
6. Schedule mass production → Cutting, corner rounding, and packaging.
7. Quality inspection, shipping, and receipt of goods.
VIII. Common pitfalls to avoid
1. Directly using images found online for printing carries a high risk of copyright infringement; for commercial card projects, always use original illustrations or assets for which you hold the copyright.
2. Converting RGB to CMYK will definitely change the color, so CMYK preview should be used during the design phase.
3. Don't ignore the bleeding; people often crop out profile pictures and key text.
4. Unit costs for small-batch custom orders are high; do not compare them to the pricing of large-scale production runs.
5. Ask whether the quote includes: design fee, sample making fee, die-cutting fee, shipping fee, and tax, to prevent hidden charges.
6. Opt for rounded corners whenever possible; sharp corners on cards can be dangerous and may cause scratches.
IX. Suggestions on the Suitable Audience
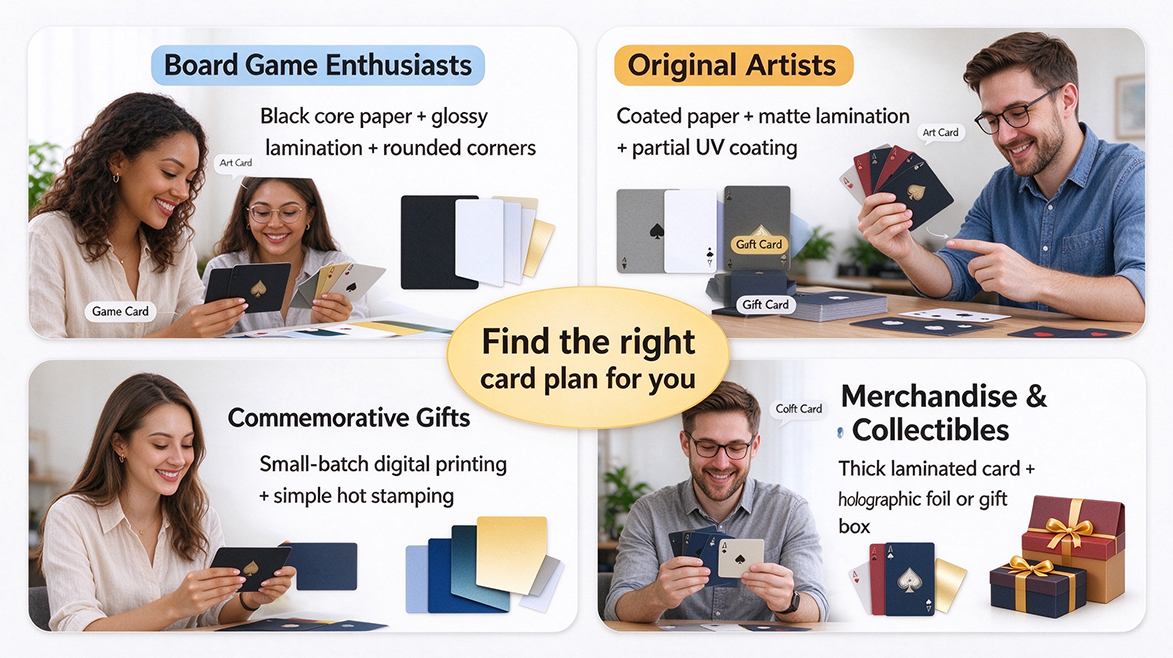
• Board game enthusiasts: Black-core paper + glossy lamination + rounded corners; prioritize prototyping to test the shuffling feel.
• Original artists / OC character cards: 300–350gsm coated paper + matte lamination; optional spot UV or foil stamping.
• Commemorative / wedding / birthday custom cards: Small-batch digital printing; simple finishing techniques suffice.
• Cross-border merchandise cards: Prioritize wear-resistant materials and sturdy packaging; consider crush protection for shipping.
Read More